
How to Install SSL on cPanel Hostname {Easy Steps}
Securing your cPanel/WHM hostname with an SSL certificate is essential to protect data transmissions and establish trust with users. Without an SSL, browsers may flag your cPanel access as "Not Secure," which can be risky.
In this guide, AquaHost walks you through the step-by-step process of installing an SSL certificate on your cPanel hostname.
Why Install an SSL on Your cPanel Hostname?
- Encrypts Data – Ensures all data exchanged between users and the server remains private.
- Prevents Security Warnings – Avoids "Not Secure" browser warnings when accessing WHM, cPanel, or Webmail.
- Enhances Trust – Boosts credibility by displaying the secure padlock icon in the browser.
- Required for Secure Services – Essential for enabling secure email access via POP3, IMAP, and SMTP.
Preparation Before SSL Installation
Before installing SSL on your cPanel hostname, ensure you have:
- Root Access to WHM – You need access to Web Host Manager (WHM) with root privileges.
- A Valid SSL Certificate – Use a Let’s Encrypt SSL (free) or a paid SSL from a Certificate Authority (CA).
- Correct DNS Settings – Your hostname (e.g., server.yourdomain.com) must resolve to your server’s IP.
- Let’s Encrypt Installed on WHM – If you plan to use Let’s Encrypt AutoSSL, install it with this command:
/usr/local/cpanel/scripts/install_lets_encrypt_autossl_provider
(This is usually pre-installed on cPanel servers.)
Step-by-Step Guide to Install SSL on cPanel Hostname
1. Log into WHM
Access your WHM panel using your root credentials:
URL: https://yourserverip:2087
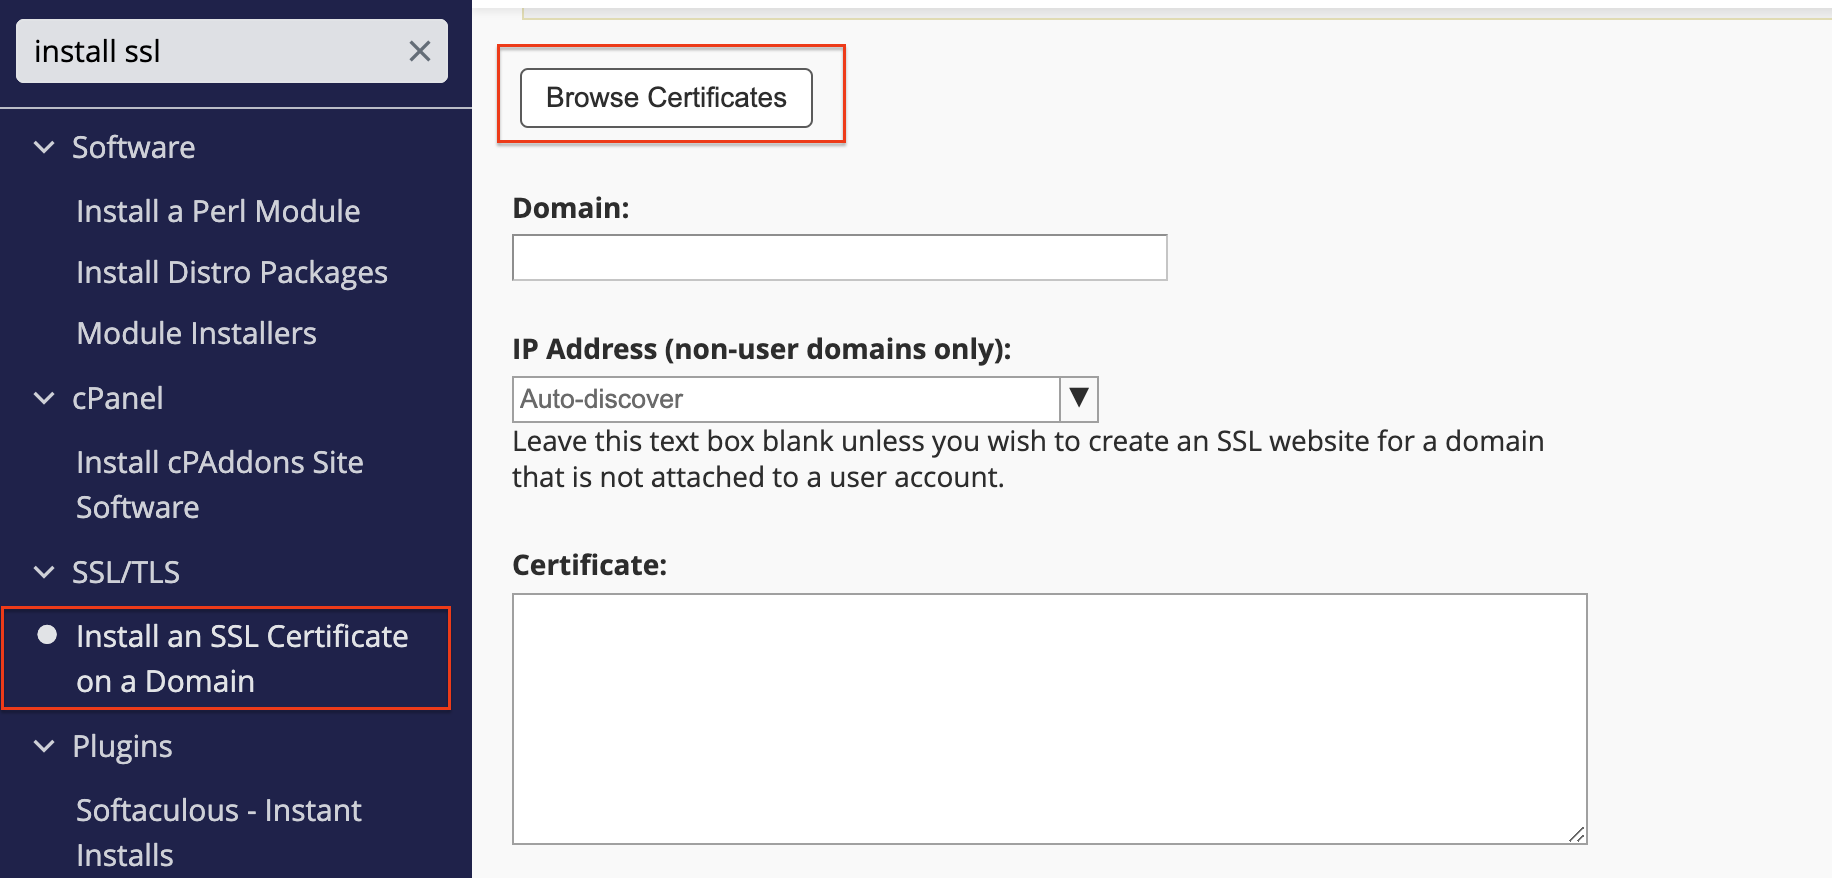
2. Navigate to SSL Installation Section
- Go to "SSL/TLS" in the left-hand menu.
- Click "Install an SSL Certificate on a Domain".
3. Enter Your Hostname
- In the "Domain" field, enter your server hostname (e.g., server.aquahost.com).
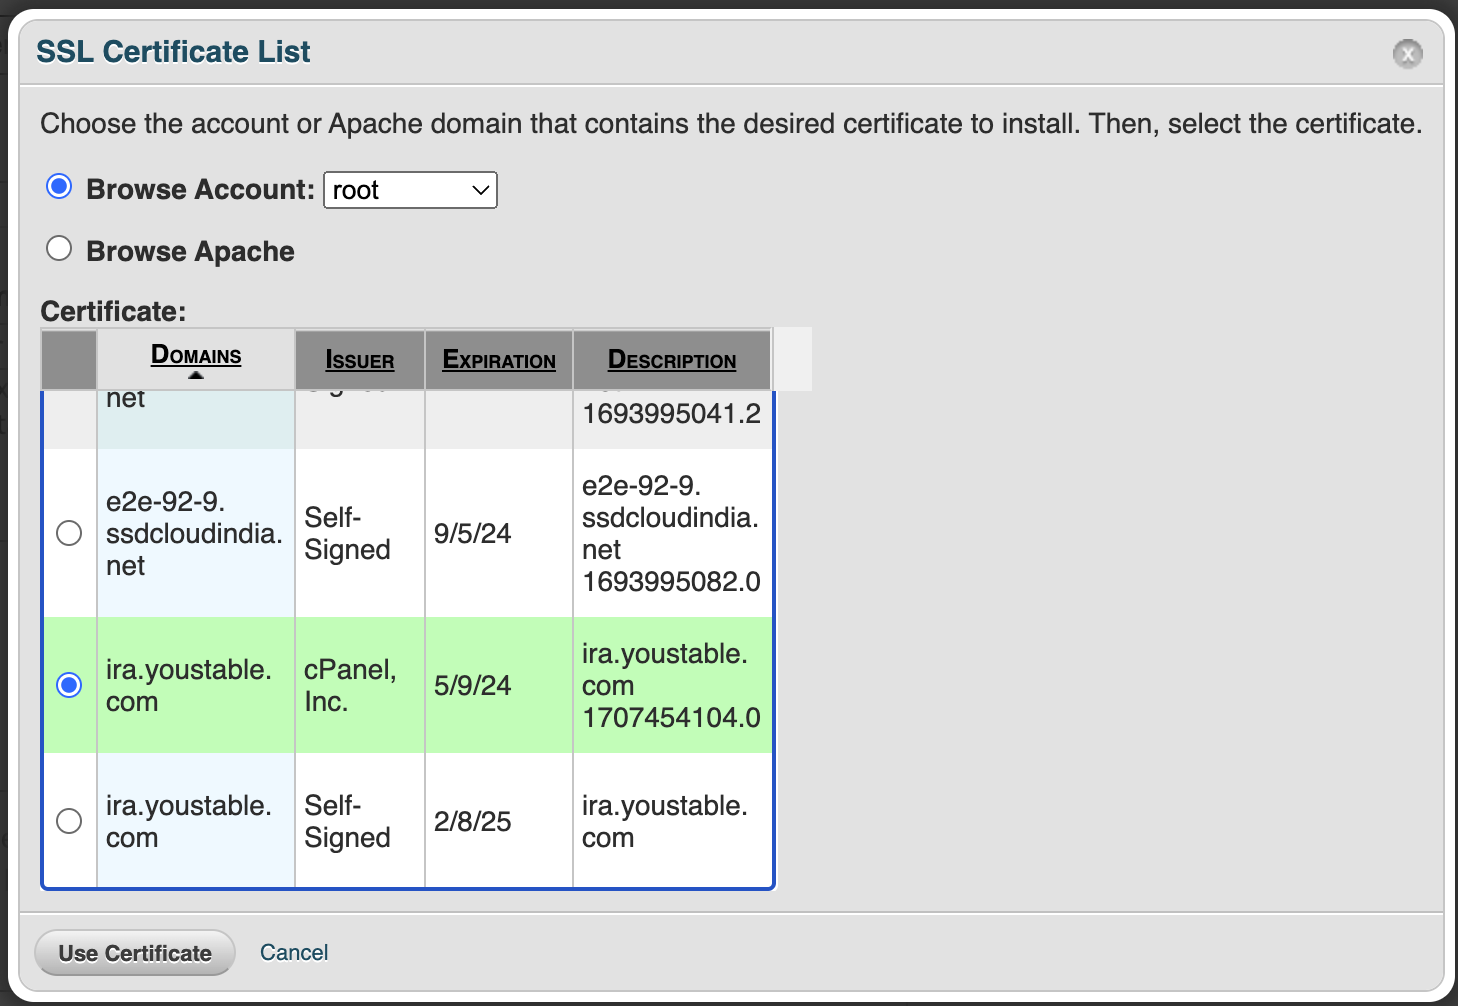
4. Provide SSL Certificate Details
You will need the following:
- Certificate (CRT) – Provided by your SSL issuer.
- Private Key (KEY) – A secret key generated during the SSL request.
- Certificate Authority Bundle (CABUNDLE) – Sometimes required for authentication.
For Let’s Encrypt SSL, you can retrieve these details from cPanel or WHM’s AutoSSL section.
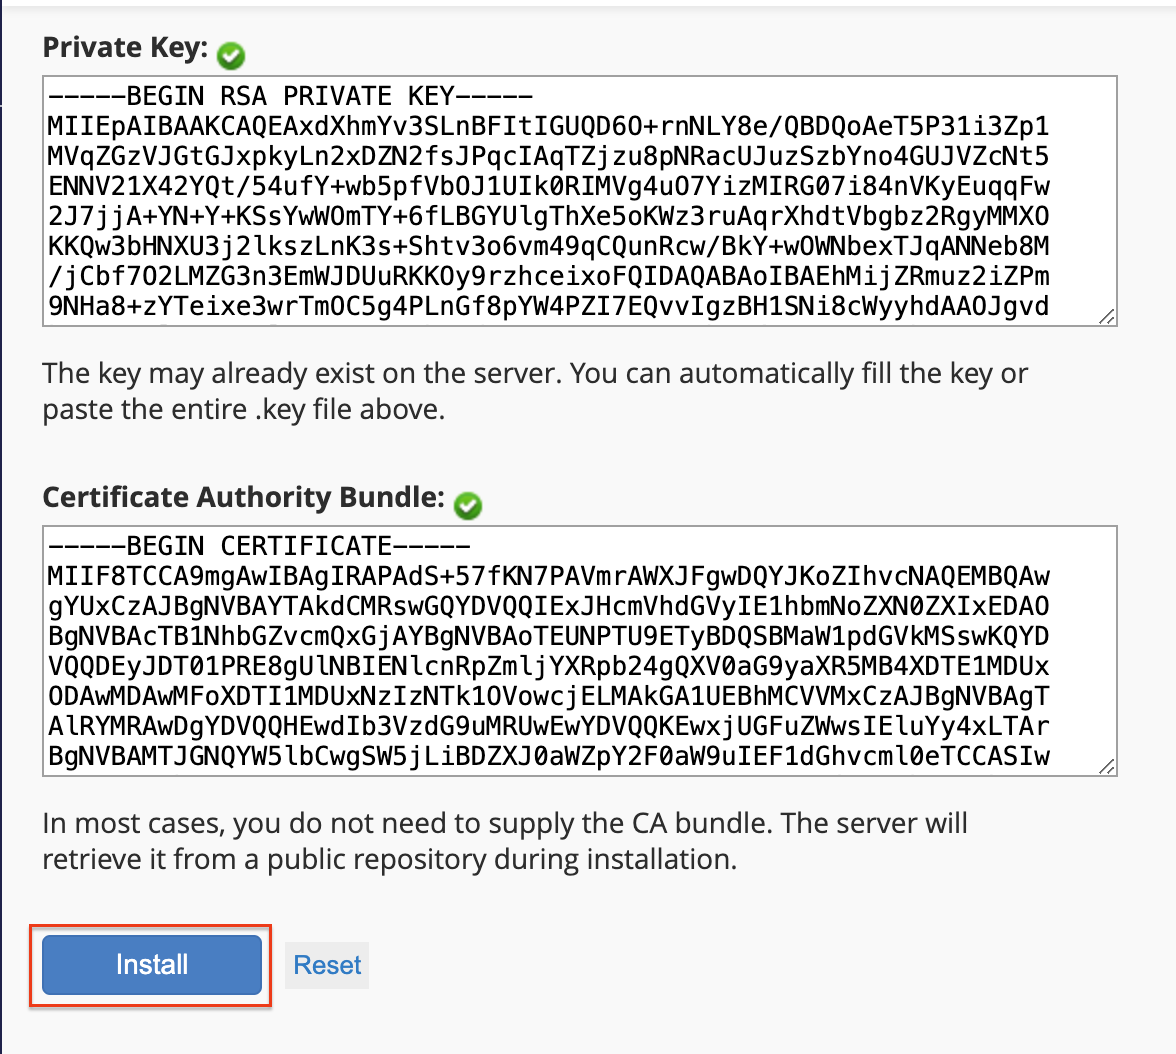
- AutoFill by Domain: Alternatively, if the system can retrieve your SSL certificate based on the domain name, you can click “Autofill by Domain” after entering the hostname. This action will populate the certificate details automatically.
- Install the Certificate: Once all information is filled in or auto-filled, click “Install”. You’ll see a confirmation message once the installation is successful.
5. Autofill SSL Information (Optional)
- If your SSL is already installed, click "Autofill by Domain" to automatically fetch the details.
6. Install the SSL Certificate
- Once all details are filled in, click "Install" and wait for the confirmation message.
7. Verify the SSL Installation
To ensure your SSL is installed correctly:
- Open https://yourhostname in a browser and look for the padlock icon.
- Use an online SSL checker tool to confirm validity.
Final Thoughts – Secure Your cPanel with AquaHost!
Installing an SSL certificate on your cPanel hostname is a quick and essential step to secure access to WHM, cPanel, and Webmail. Whether you choose Let’s Encrypt AutoSSL or a paid SSL, following these steps ensures a smooth installation.
Need help with SSL installation? If you're an AquaHost customer, our expert support team is available 24/7 to assist you!
Get SSL-secured hosting with AquaHost today!